Classics · Illustrated · Primer

HOLMES

The HipHop Detective
A dramatized primer of the Sherlock Holmes canon — one episode per case, faithful to Conan Doyle
HOLMES — cover plate
↑ Casebook
No. 1HOLMES · THE HIPHOP DETECTIVE

Episode I

A Scandal in Bohemia (The Adventures of Sherlock Holmes)

Episode I: A Scandal in Bohemia (The Adventures of Sherlock Holmes)images/book01.jpg
🎙️ THE MUSE

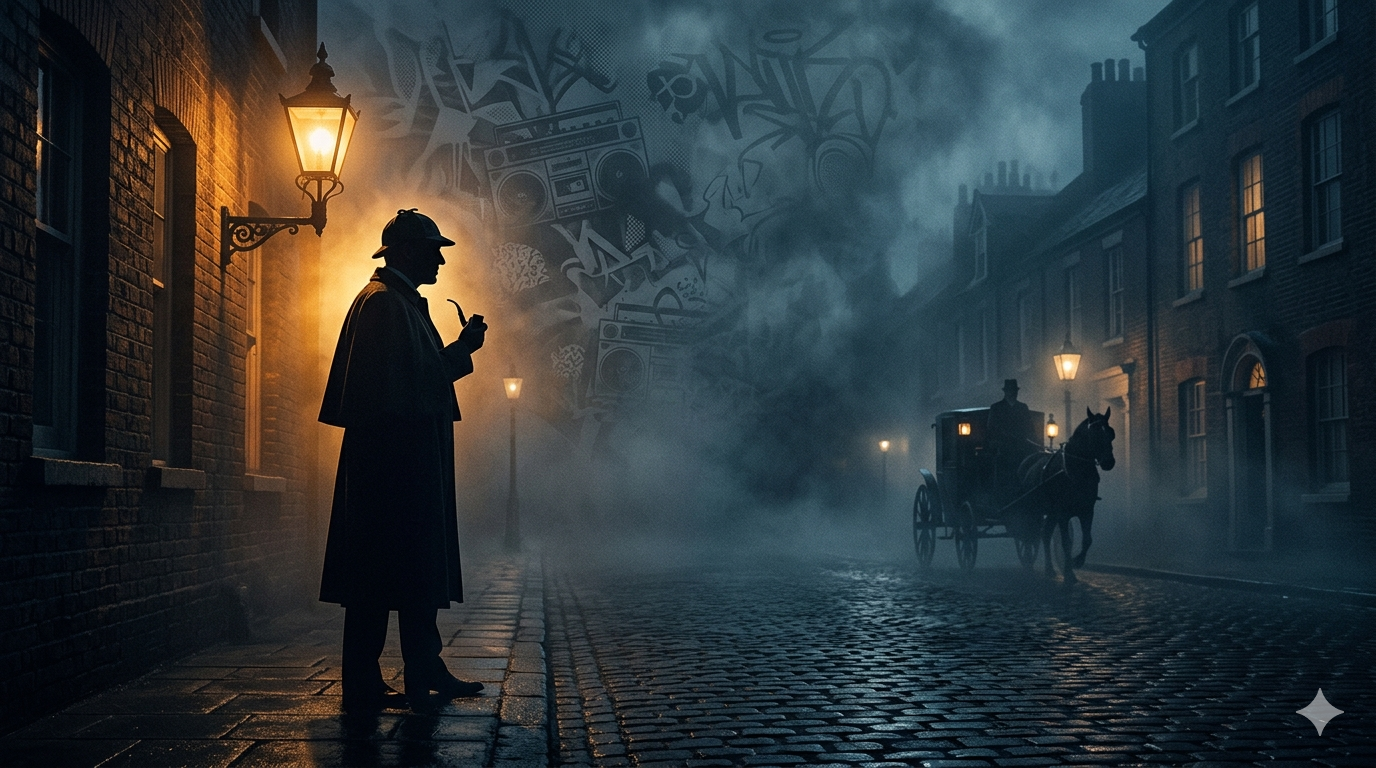
Oh, here's a pretty problem. A king—an actual king—comes creeping up the seventeen steps to Baker Street in a mask, as if a mask ever fooled the man upstairs. He wants a photograph back. He is terrified of a woman. And watch, now: Holmes will tell you her height, her habits, and her handwriting before he has so much as left his chair—and still, *still,* he has no idea what he is walking into. Keep your eye on the woman. The Muse will say no more than that.

Turn 1WATSON🩺

He hands me the note and asks what I make of it.
Heavy paper. Pink-grey. Held it to the light like he taught me—
a monogram in the weave, a maker's mark.
I see a letter. Holmes sees the man who wrote it,
the country he wrote it from, and why his hand was shaking.
I have learned to just hand him the paper.

Turn 2HOLMES🔎

You see, but you do not observe. The distinction is clear.
You have seen the steps up from the hall a thousand times.
How many are there? You don't know—you never counted.
I count. That is the whole of it. That is the trick there isn't.

Turn 3CLIENT🧥

He enters, masked and tall, with boots trimmed in fur.
A German nobleman, Bohemian paper, a message of urgency.
The King of Bohemia has lost a photograph that could ruin him—
a woman's picture he must have back, no matter the cost.

Turn 4HOLMES🔎

"No data yet," he says, "but this note is from a German in Bohemia."
He studies it, then turns to Watson: "What do you deduce?"
Watson points out details of the paper—the maker's mark, the weight.
Holmes nods and says, "Precisely," before turning back to the note.

Turn 5HOLMES🔎

He starts to unravel the mystery: "The 'G' with the small 't' stands for 'Gesellschaft,' which is German for Company."
Watson looks on, amazed as Holmes reveals the note's origin.
"Now for the 'Eg.' Let us glance at our Continental Gazetteer."
He flips open a large brown book and reads aloud: "Eglow, Eglonitz—here we are, Egria."

Turn 6CULPRIT🃏

"This is interesting," says Holmes. "A visitor comes, masked but revealed by his gait and boots."
The Count Von Kramm enters, tall and wealthy, with a brooch of flaming beryl.
Holmes questions him: "Whom have I the honor to address?" The count replies,
"I am the Count von Kramm, a Bohemian nobleman." Holmes asks if he can trust him.

Turn 7HOLMES🔎

He asks the Count about his mission—a matter of "the most extreme importance."
The Count explains that he seeks Holmes's help to retrieve a photograph.
Holmes agrees, and the Count tells them they must meet at Briony Lodge at eight.
He warns them that Irene Adler, the woman in the photograph, is married now.

Turn 8HOLMES🔎

The Count leaves, and Holmes turns to Watson: "Irene Adler is married. Married! When?"
Watson: "Yesterday." Holmes: "To whom?" The Count: "An English lawyer named Norton."
Holmes: "But she could not love him." The Count: "I am in hopes that she does."
Holmes: "I am in hopes that she does *not*." The Muse steps in: "And why in hopes?"

Turn 9 — HOLMES 🔎 (THE REVEAL)

Holmes explains: "Because it would spare your Majesty all fear of future annoyance. If the lady loves her husband, she does not love your Majesty."
The King seems pleased, but Holmes continues: "If she does not love your Majesty, there is no reason why she should interfere with your Majesty's plan."
The King nods, and they set a plan to meet at Briony Lodge the next day.
But when they arrive, the house is empty—Irene Adler has fled with her husband.

EXIT 🚪

The Muse closes the case: "And that was how a great scandal threatened to affect the kingdom of Bohemia, and how the best plans of Mr. Sherlock Holmes were beaten by a woman's wit." The Muse smiles: "He used to make merry over the cleverness of women, but I have not heard him do it of late. And when he speaks of Irene Adler, or when he refers to her photograph, it is always under the honorable title of _the_ woman."

No. 2HOLMES · THE HIPHOP DETECTIVE

Episode II

The Red-Headed League (The Adventures of Sherlock Holmes)

Episode II: The Red-Headed League (The Adventures of Sherlock Holmes)images/book02.jpg
🎙️ THE MUSE

(Holmes and Watson in Baker Street, a flustered client in tow)
Ah, here's the curious case of the Red-headed League. A pawnbroker with a penchant for peculiar ads finds himself hired into a league, not for camaraderie, but to empty his shop by day. The real plot? John Clay tunneling from the cellar toward a bank vault.

Turn 1WATSON🩺

(Handing Holmes a note)
The paper's heavy, pink-grey. He holds it to the light, sees a maker's mark in the weave: a monogram.

Turn 2HOLMES🔎

A letter? No, a man. His country. His shaking hand. He's seen it all before. I count the steps up from the hall a thousand times — but have you? That's the trick there isn't.

Turn 3 — CLIENT 🧥 (Wilson)

(Explaining the League and the copying task)
A vacancy open, entitles to £4 a week for nominal services. All red-headed men eligible. Applications on Monday...

Turn 4HOLMES🔎

(Noticing Wilson's assistant Spaulding's absence)
A missing assistant — a fondness for photography — a trick of vanishing into the cellar...

Turn 5 — CLIENT 🧥 (Wilson)

(Describing his assistant Spaulding and the copying room)
He's been with me nine years, Mr. Holmes. A good worker, no vice in him...

Turn 6HOLMES🔎

(Theorizing about a tunnel from the cellar to the bank vault)
I see a cellar, hear the sound of rending cloth as Jones clutches at his skirts...

Turn 7 — INSPECTOR 👮 (Lestrade)

(Arrives with Scotland Yard and the bank directors)
We have three men waiting for your assistant at the door, Mr. Wilson...

Turn 8HOLMES🔎

(Catches John Clay in the act in the bank vault)
It's all clear, John Clay. You have no chance at all...

Turn 9 — HOLMES 🔎 (THE REVEAL)

The Red-headed League was a sham to keep Wilson out of the way during the day. The real plot: John Clay tunnelling from the pawnshop cellar toward the bank vault. Holmes waits in the vault and catches him in the act.

EXIT 🚪

The bank director expresses gratitude for the detection of the attempted robbery. Holmes mentions his small expenses, expecting reimbursement from the bank. The case closed, Holmes and Watson return to Baker Street, leaving a thread of unfinished business...

No. 3HOLMES · THE HIPHOP DETECTIVE

Episode III

A Case of Identity (The Adventures of Sherlock Holmes)

Episode III: A Case of Identity (The Adventures of Sherlock Holmes)images/book03.jpg
🎙️ THE MUSE

Here's a case for our man Holmes, as he sits in Baker Street, puffing on his pipe. He says life is stranger than fiction. Watson scoffs, but the paper tells another tale. A husband's cruelty to his wife—or so it seems. But what if the villain wears a disguise?

Turn 1WATSON🩺

Holmes takes the morning paper from my hand, scanning the headline. "It's a common enough tale," he says, but I know better. He reads further—a husband who hurls his false teeth at his wife? Now that's something you won't find in a novel.

Turn 2HOLMES🔎

The case is dull, Watson. Nothing to excite the mind. Then a knock on the door—a woman stands outside, hesitant, nervous. "I have seen those symptoms before," Holmes says. "She wants advice but fears it's too delicate."

Turn 3MISS SUTHERLAND🧥

The woman enters, and Holmes welcomes her with ease. She tells him of her missing fiancé, Hosmer Angel—a man she met at a gasfitters' ball. Holmes asks about the office where he worked, and Miss Sutherland reveals it to be Westhouse & Marbank in Fenchurch Street.

Turn 4INSPECTOR LESTERY👮

Lestry, a Scotland Yard inspector, arrives, seeking Holmes's help on the case. "I have heard of you from Mrs. Etherege," Miss Sutherland says, recalling how Holmes helped her friend. "You found so easy when the police and everyone had given up hope."

Turn 5HOLMES🔎

Holmes listens as Miss Sutherland recounts her story—how she met Hosmer Angel, their engagement, and his sudden disappearance. He asks about letters from the man, and Miss Sutherland admits they were typewritten.

Turn 6 — HOLMES 🔎 (THE REVEAL)

Holmes begins to piece together the puzzle. "The man married a woman much older than himself for her money," he says, "and enjoyed the use of the daughter's income as long as she lived with them." He reveals that James Windibank, Miss Sutherland's stepfather, disguised himself as Hosmer Angel to keep her from marrying another man.

Turn 7WATSON🩺

Watson watches as Holmes confronts Windibank, who denies the accusations but admits to a deception—not of love, but of fraud. "It was only a joke at first," he says, but Holmes exposes his true intentions.

Turn 8 — HOLMES 🔎 (THE CULPRIT)

Holmes tells Windibank that his actions are not only cruel and heartless, but also illegal. The man is forced to admit the truth—that he never intended to marry Miss Sutherland, only to keep her income for himself. Holmes hands him over to Scotland Yard.

EXIT 🚪

The case is closed, but Miss Sutherland remains in the dark. Holmes chooses not to tell her the truth, believing it would cause more harm than good. He sends her on her way with a parting word: "There's danger for him who taketh the tiger cub, and danger also for whoso snatches a delusion from a woman." The muse leaves us with one final thought—that the truth can be a dangerous thing indeed.

No. 4HOLMES · THE HIPHOP DETECTIVE

Episode IV

The Boscombe Valley Mystery (The Adventures of Sherlock Holmes)

Episode IV: The Boscombe Valley Mystery (The Adventures of Sherlock Holmes)images/book04.jpg
🎙️ THE MUSE

Here's a mystery that'll rattle the cobwebs. A farmer, John Turner, dead in a wood. His son, James, arrested for the murder, but there's more to this tale than meets the eye. And watch: Holmes will sniff out the truth like a bloodhound on the scent. Keep your ears open. The Muse won't give it away just yet.

Turn 1WATSON🩺

Holmes, I read the report in the paper. It seems cut-and-dry. James McCarthy killed his father and now faces trial.

Turn 2HOLMES🔎

Ah, Watson, but what do you know of circumstantial evidence? The facts may point to one thing, but there's always another angle that hasn't been considered. In this case, the son may be innocent, and we must find the real culprit.

Turn 3CLIENT🧥

Holmes, I beg you. James McCarthy is a good man, and I cannot bear to see him wronged. He told me everything that happened, but there's one detail that stands out: his dying words were "a rat... Cooee." What does it mean?

Turn 4HOLMES🔎

It means Ballarat, Australia. The old man was once known as Black Jack of Ballarat, a notorious highwayman. He must have been blackmailed into silence about his past crimes. But how did this connect to the murder? That's the puzzle we must unravel.

Turn 5CULPRIT🃏

Ah, Holmes, I see now. Turner was threatened with exposure of his past, and he feared losing everything—his land, his reputation, even his daughter. He knew James would never stoop to murder, but if he didn't take action himself, someone else might reveal the truth. So he lured James to the wood, gave him a gun, and then attacked his father, making it look like James was the killer.

Turn 6INSPECTOR👮

Holmes, I must admit, your deductions are astonishing. But Turner is dying—he has diabetes. He cannot be tried for the murder. What should we do?

Turn 7HOLMES🔎

I have extracted a confession from Turner, but it will only be used if necessary. We must clear James McCarthy's name and let him live in peace with his father's memory intact.

EXIT 🚪

And so the Boscombe Valley mystery is solved, but there are still many more cases waiting for Sherlock Holmes and Dr. Watson to unravel. Stay tuned for more adventures in crime-solving. The Muse will be here to guide you through each twist and turn.

No. 5HOLMES · THE HIPHOP DETECTIVE

Episode V

The Five Orange Pips (The Adventures of Sherlock Holmes)

Episode V: The Five Orange Pips (The Adventures of Sherlock Holmes)images/book05.jpg
🎙️ THE MUSE

Here's a twist that will send chills down your spine. A young man with a hidden past seeks help, but it's too late to save him from a fate as grim as the autumn storm outside. The trail leads back to a ship sailing into the heart of darkness - and a secret society that will stop at nothing to protect their secrets.

Turn 1WATSON🩺

Holmes ponders the note, eyes narrowed like a hawk on its prey. He reads it aloud: "A warning from the Invisible Empire of the South." Five orange pips. It's a Klan death threat demanding Openshaw return papers or face dire consequences.

Turn 2HOLMES🔎

Openshaw arrived yesterday, seeking help for his family. The pips are a symbol - one they use to intimidate and kill. I've seen it before in America, but never here. We must find the ship he came from, trace the Klan, and save what remains of his family.

Turn 3CLIENT🧥

John Openshaw - a young man with a tragic past. His family has been tormented by the Klan for generations. He fears they'll kill him as they did his uncle, but he has a plan: expose their secrets to the world and bring them down.

Turn 4CULPRIT🃏

Colonel Elias Openshaw - a former Confederate officer who moved back to England after the war. He was a member of the Klan, but when he tried to leave, they threatened him and his family. His letters to America hold evidence that could expose them.

Turn 5INSPECTOR👮

Openshaw's body is found near Waterloo Bridge, a tragic end to a desperate man. The police are baffled, but Holmes knows the truth. He traces the _Lone Star_, an American ship that recently docked in London, and sets out to find the killers before they strike again.

Turn 6HOLMES🔎

The _Lone Star_ has sailed for Savannah. I wire ahead, warning the police of three suspects on board - the ship's captain and two crew members with American names. The Klan will be expecting retaliation, but they won't see it coming.

Turn 7 — HOLMES 🔎 (THE REVEAL)

The _Lone Star_ is lost at sea in a storm. The killers are gone, but their secrets live on. Openshaw died trying to expose them, but his sacrifice was not in vain. His family will be safe, and the Klan's dark reign will end - if only it were that easy.

EXIT 🚪

And so, another case closed. But the battle against evil is never truly over. The wind howls outside, a reminder of the storm that still rages in the hearts of men. The game continues - Holmes and Watson will face new challenges, new mysteries, and new enemies. And they'll always be ready - because that's what heroes do.

No. 6HOLMES · THE HIPHOP DETECTIVE

Episode VI

The Man with the Twisted Lip (The Adventures of Sherlock Holmes)

Episode VI: The Man with the Twisted Lip (The Adventures of Sherlock Holmes)images/book06.jpg
🎙️ THE MUSE

Now here's a twist. A doctor gets a visit in the dead of night,
from a lady dressed in black and weeping. She pleads for help—
her husband, an addict, gone missing in the city's underbelly.
Holmes steps into that den of villains with a question on his mind:
What is the game here? And what part does he play?

Turn 1WATSON🩺

The opium den, dim and foul with smoke, teems with lowlifes.
Whitney's there, pale and shattered, but Holmes isn't among them.
A voice whispers from the shadows, "Walk past me, then look back."
I glance—and there he is, hidden in disguise, grinning at my surprise.
He motions for me to approach. I send Whitney home and wait outside.

Turn 2HOLMES🔎

The cab drives us eastward through the dark, empty streets of London.
Holmes walks with a stoop, but suddenly straightens up and laughs.
"I've come to find an enemy," he says. "One of my natural enemies—or prey."
I ask if he means bodies in that den, and he confirms it—a murder-trap.
He believes Neville St. Clair has entered it never to leave again.
But the trap is set for someone else.

Turn 3 — HOLMES 🔎 (THE REVEAL)

We arrive at St. Clair's house, The Cedars, near Lee in Kent.
Holmes and I split up to search—he examines the grounds, I check the rooms.
I find a photograph of a woman on a table—beautiful, but with a cruel glare.
Holmes enters, and I hear him say, "Ah! Here's your secret."
He removes St. Clair's disguise to reveal his face beneath—alive and well.

Turn 4HOLMES🔎

St. Clair tells us he is a reporter who took up begging for an article.
It became a lucrative habit, so he hid it from his wife—even injuring himself
to throw off suspicion. The police have been watching the opium den,
and St. Clair fears they will find out his secret and ruin him.
Holmes assures him that the police will hush the matter if he confesses.

EXIT 🚪

St. Clair thanks Holmes for saving him from disgrace. The case is closed,
but the Muse knows this tale has just begun—for every mystery leads to another.

No. 7HOLMES · THE HIPHOP DETECTIVE

Episode VII

The Adventure of the Blue Carbuncle (The Adventures of Sherlock Holmes)

Episode VII: The Adventure of the Blue Carbuncle (The Adventures of Sherlock Holmes)images/book07.jpg
🎙️ THE MUSE

Here's a curious puzzle for you. A stolen gem, the blue carbuncle, found in a Christmas goose. A man on trial for the crime he didn't commit. All signs point to a cat-and-mouse game of deception. But watch out for the unexpected twist. The game is afoot...

Turn 1WATSON🩺

Holmes, here's a hat that arrived at our doorstep on Christmas morning. It's battered and worn, but it has an air of mystery about it. I can't see what you can find in this old thing.

Turn 2HOLMES🔎

Ah, Watson, my dear friend! You fail to observe the details that matter. This hat belonged to a man of intellect, but now in hard times. He's been drinking, and his wife no longer loves him. But he still holds some self-respect. He leads a sedentary life, with grizzled hair recently cut and lime-cream anointed. The dust on this hat speaks of the fact that gas is not laid on in his house.

Turn 3HOLMES🔎

Now, let's turn our attention to the goose that came with the hat. It had a card tied to its leg: "For Mrs. Henry Baker." And, Watson, if you look closely at this hat's lining, you will find the initials H.B. — the same as on the card.

Turn 4 — CLIENT 🧥 (Peterson)

Holmes! I've returned the goose to its owner, but there was a surprise inside: a brilliant blue stone, larger than a bean and glowing like an electric point. It cuts through glass as if it were putty. It must be _the_ precious stone — the Countess of Morcar's blue carbuncle!

Turn 5HOLMES🔎

Indeed, Peterson! This is a treasure trove indeed. I would wager that the owner of this hat was the one who stole it. Now, let's find out how it came to be in the goose...

Turn 6 — CULPRIT 🃏 (Ryder)

I confess! It was me who took the blue carbuncle and hid it in the goose. I knew Horner, the plumber, would be suspected, so I framed him. But I never meant to harm anyone. Please, have mercy...

Turn 7HOLMES🔎

Your confession is noted, Ryder. You will not face trial now, but you must make amends for your actions. Horner's character has been restored, and he will be compensated for his suffering. Remember, this is a season of forgiveness...

EXIT 🚪

With the blue carbuncle safely returned and justice served, Holmes turns to me with a knowing smile. "Ah, Watson," he says, "another mystery solved. But I fear our next case will be far less whimsical." And so we leave Baker Street, ready for whatever adventure awaits us next. The game is never truly over...

No. 8HOLMES · THE HIPHOP DETECTIVE

Episode VIII

The Adventure of the Speckled Band (The Adventures of Sherlock Holmes)

Episode VIII: The Adventure of the Speckled Band (The Adventures of Sherlock Holmes)images/book08.jpg
🎙️ THE MUSE

Here's a tale straight outta Surrey, where the Roylotts once ruled supreme. But now they're a family in disarray, their ancestral home a shadow of its former glory. A young lady comes knocking at Baker Street, her heart heavy with dread and fear. What could possibly be troubling Miss Helen Stoner? Holmes will unravel this mystery, but first he must navigate the tangled web spun by the last surviving Roylott.

Turn 1WATSON🩺

The lady's tale is a chilling one: of a stepfather who has grown increasingly cruel and violent, driving her sister to an early grave. Holmes listens intently, his eyes never leaving Miss Stoner. He asks about the family home, its layout, the mysterious noises that keep them awake at night.

Turn 2HOLMES🔎

The old house is a maze of secrets and shadows. The bedrooms are on the ground floor, each with a window looking out onto the lawn. But there's no communication between them—only a long corridor separating them all. And then there's that ventilator in the ceiling...

Turn 3CLIENT🧥

She tells us about the night her sister died: a strange whistle, a faint smell of burning oil, and then silence. Holmes leaps from his chair, striking a match to reveal a dark-lantern still lit in their stepfather's room. But something else catches his eye—a peculiar yellow band with brownish speckles around the doctor's brow.

Turn 4HOLMES🔎

The band is not just any ordinary headband—it's a perfect disguise for the venomous fangs of a swamp adder, one of the deadliest snakes in India. Holmes deduces that the doctor must have trained this creature to attack through the ventilator, using a deadly poison that would leave no trace behind.

Turn 5HOLMES🔎

But there's more: the doctor had been standing on a chair to reach the ventilator, and Holmes notices that the chair is clamped to the floor. This means the snake could only have come from one direction—the room next door. The doctor was murdered by his own deadly pet.

Turn 6INSPECTOR👮

Holmes and Watson rush to Stoke Moran to break the news to Miss Stoner and ensure her safety. They find the house deserted, save for the cheetah and baboon roaming freely. The local constabulary is called in, and they soon arrive to secure the crime scene.

Turn 7HOLMES🔎

The police are baffled by the case—how could anyone have smuggled a deadly snake into the house without being detected? Holmes explains his deductions, showing them the loop of whipcord he found in the doctor's room, which was used to control the snake. They all stand in shock as Holmes reveals the truth behind the doctor's death.

Turn 8HOLMES🔎

With the case solved and the murderer exposed, Miss Stoner is finally free from her tormentor. She thanks Holmes profusely, promising to repay him when she comes into her inheritance. Holmes waves it off, saying that his profession is its own reward. The Muse smiles, knowing there's always another mystery waiting around the corner.

EXIT 🚪

And so another case is closed, but the mysteries of mankind remain endless. Holmes sits back in his chair, a satisfied smile on his face. He takes out his violin and begins to play a lively tune—a fitting end to a day of deduction and intrigue. The Muse fades away, leaving you to ponder the complexities of human nature and the endless possibilities of the mind of Sherlock Holmes.

No. 9HOLMES · THE HIPHOP DETECTIVE

Episode IX

The Adventure of the Engineer’s Thumb (The Adventures of Sherlock Holmes)

Episode IX: The Adventure of the Engineer’s Thumb (The Adventures of Sherlock Holmes)images/book09.jpg
🎙️ THE MUSE

(A young engineer, fresh from business school, hires Holmes to unravel a peculiar mystery. He's been hired to repair a 'hydraulic press', but it ain't no ordinary machine — it's a counterfeiting operation run by an elusive gang. The gang tries to kill him, he escapes with a missing thumb, and the house is burned down before the police arrive.)

Turn 1WATSON🩺

(Holmes examines the engineer's paperwork, sees it's from a German supplier. I've no clue what he means by "the Englishman.")

Turn 2HOLMES🔎

(Holmes tells me to send for the engineer and the inspector. He's off on his own, deducing details about the gang from their paperwork.)

Turn 3INSPECTOR👮

(He arrives, Holmes hands him the papers, says "These are your counterfeiters.")

Turn 4HOLMES🔎

(Holmes explains: the German supplier, the English overseer, the counterfeits made with nickel and tin. He deduces their modus operandi from the way the paper is cut.)

Turn 5CLIENT🧥

(The engineer arrives, tells his tale. Holmes asks about a German woman who was there. The engineer confirms her presence but can't tell much about her.)

Turn 6HOLMES🔎

(Holmes says the woman is crucial to their case. He describes her in detail: her height, her clothes, even her handwriting. The engineer is stunned.)

Turn 7INSPECTOR👮

(The inspector asks how Holmes knows so much about a woman he's never seen. Holmes says it's all in the details.)

Turn 8HOLMES🔎

(Holmes tells the inspector to set up a stakeout at train stations with descriptions of the woman and the Englishman. The game is afoot.)

EXIT 🚪

(The case remains unsolved, but Holmes has given the police a clear lead. As the engineer leaves, he thanks Holmes for his help and says he'll never forget it.)

No. 10HOLMES · THE HIPHOP DETECTIVE

Episode X

The Adventure of the Noble Bachelor (The Adventures of Sherlock Holmes)

Episode X: The Adventure of the Noble Bachelor (The Adventures of Sherlock Holmes)images/book10.jpg
🎙️ THE MUSE

Here's a tale as old as time, a riddle wrapped in royalty, a bride vanishes at the wedding feast. And there's the man, Lord St. Simon, left to pick up the pieces. But something doesn't quite add up, and Holmes will sift through the clues like a master chef sieves his soup. Watch as he finds the hidden recipe that solves this mystery, but leaves a dash of intrigue for the Muse to season with wit.

Turn 1WATSON🩺

He's pored over every newspaper, looking for anything on Lord St. Simon's wedding. He finds something odd: no mention of the bride before the ceremony, but a sudden announcement afterwards. It seems she disappeared at breakfast. I hand him a letter from the nobleman himself.

Turn 2HOLMES🔎

Ah, Watson, you see a paper, I see the ink that stains it. This note was penned with a quill, an old-fashioned tool rarely used nowadays. The man who wrote this letter is well-educated, a gentleman of means. And there's more: the ink smear on his finger tells us he is right-handed. A clue, perhaps?

Turn 3WATSON🩺

I bring him the morning papers, full of gossip about the wedding. It seems Lord St. Simon married an American heiress. The bride's name is Hatty Doran. There are rumors of a large dowry, and it appears the Duke of Balmoral had to sell his pictures to pay his debts.

Turn 4HOLMES🔎

Ah, Watson, you see facts, I see connections. The Dorans are from San Francisco. This bride has a claim on Lord St. Simon—and not just because of her fortune. There's more to this story than meets the eye. I sense a secret past between these two that may hold the key to the mystery.

Turn 5CLIENT🧥

Lord St. Simon arrives, looking every bit the nobleman. He tells us his bride vanished during the wedding breakfast. There was a disturbance at the house before she disappeared, a woman who claimed some kind of connection to Lord St. Simon. Holmes insists on hearing more.

Turn 6HOLMES🔎

The client recounts how a woman tried to force her way into the house after the wedding, claiming she had some claim on Lord St. Simon. But there's a strange detail: the woman was ejected by the butler and footman before the bride vanished. I sense a connection between these two women—and between this woman and Lord St. Simon's mysterious past.

Turn 7CULPRIT🃏

Later that day, the woman who had caused the disturbance is arrested. She was once a dancer at the Allegro, and she had known Lord St. Simon for years. I sense Holmes' interest piqued—and his suspicions confirmed. This woman knows more than she lets on.

Turn 8HOLMES🔎

I summon Lord St. Simon to my rooms, where he meets the American dancer who had been arrested. She confesses that she and Lord St. Simon had secretly married years ago, but she had given him up for dead when he was captured by Apaches. They reconnected on the day of his wedding, and she followed him to England.

Turn 9HOLMES🔎

The nobleman is shocked and humiliated, but there's no crime here—only a woman who refused to let go of her past love. Lord St. Simon leaves our rooms with a cold nod, still reeling from the revelation. Holmes turns to me with a smile: "Ah, Watson, sometimes the simplest explanation is the most elusive."

EXIT 🚪

The case closed, Holmes picks up his violin and begins to play. He's always found the answers, but he never loses his love for the chase—and for the music that helps him think. The Muse will leave this tale with a hint of mystery, just as it began. After all, there's always another case waiting around the corner.

No. 11HOLMES · THE HIPHOP DETECTIVE

Episode XI

The Adventure of the Beryl Coronet (The Adventures of Sherlock Holmes)

Episode XI: The Adventure of the Beryl Coronet (The Adventures of Sherlock Holmes)images/book11.jpg
🎙️ THE MUSE

A madman's running down the street, and here he comes, panting, to our door.
He's rich as a king, but his eyes are wild with grief. What's in that case?
And why does he look like he's just been through hell? Keep your eyes on the case.
The Muse will say no more than that.

Turn 1WATSON🩺

He holds it out to us, a black morocco box with velvet inside.
And what's in there, pray tell? A golden treasure fit for a queen.
But what's the cost of its protection? A banker's son's reputation, it seems.
Suspected of theft — but he's innocent. Keep your eyes on the stolen gems.

Turn 2HOLMES🔎

You see the man and his grief, Watson, but you don't see the motive.
The coronet was pledged as collateral for a loan. And where is it now?
In pieces, it seems. But who took them, and why? The answers are elusive.
Keep your eyes on the banker, and his noble client — and the missing stones.

Turn 3CLIENT🧥

It's the Duke of Holdernesse himself! He stands before us, his face a mask.
He demands the return of his priceless Beryl Coronet. But who would dare steal it?
And why is Arthur Holder, the banker's son, accused and in disgrace? The truth we seek.
Keep your eyes on the Duke — and the stolen gems — and the silent protector.

Turn 4CULPRIT🃏

The Duke is a man of many secrets, but none so dark as this one.
His wooden leg leaves tracks in the snow outside the banker's house.
He waited for Arthur to bring the coronet out at night. But who was his partner?
Keep your eyes on the Duke — and Mary Holder, the banker's niece — and the lover.

Turn 5INSPECTOR👮

The inspector is baffled. He has no leads, no suspects, no clues to go on.
But Holmes can see it all. The struggle in the snow. The blood on the pavement.
The missing piece of the coronet — and the guilty party that fled with it.
Keep your eyes on Holmes — and the inspector — as he solves the case, step by step.

Turn 6HOLMES🔎

I follow the tracks in the snow to the Duke's house. I find his valet, who tells me all.
The Duke had cut his head in a scuffle with Arthur Holder. But who was the real thief?
Mary Holder, it seems — and her lover, Sir George Burnwell. The pieces fall into place.
Keep your eyes on Holmes — and the duo that fled with the stolen gems — as I find them.

Turn 7HOLMES🔎

I confront Sir George Burnwell in his home, but he denies everything at first.
But then I show him the Duke's cast-off shoes, and he cracks. He tells me all.
He sold the gems for six hundred pounds each — but now I can get them back.
Keep your eyes on Holmes — as he negotiates with Burnwell — and gets the stolen treasure.

Turn 8HOLMES🔎

I return to Baker Street, where Arthur Holder awaits me. He thanks me for my help.
But then I tell him the truth about his cousin Mary. She is with Burnwell now.
And she will pay a heavy price for her sins, as will he. The case is closed.
Keep your eyes on Holmes — as he delivers the news to Arthur Holder — and the Muse closes the case.

EXIT 🚪

The banker's son is saved from ruin. The stolen gems are returned. But at a cost.
A noblewoman has been shamed, and a man of ill repute will pay for his crimes.
And Holmes? He goes back to his violin, his cocaine, and his life of mystery.
The Muse will say no more than that — but you know the rest of the story.

No. 12HOLMES · THE HIPHOP DETECTIVE

Episode XII

The Adventure of the Copper Beeches (The Adventures of Sherlock Holmes)

Episode XII: The Adventure of the Copper Beeches (The Adventures of Sherlock Holmes)images/book12.jpg
🎙️ THE MUSE

Here's a mystery that'll make your head spin. A governess position, far from home, with a salary as high as the moon. But there's something rotten in Copper Beeches, and it ain't just the fog rolling in off the moors. The game is afoot, but Holmes won't be led by his nose.

Turn 1WATSON🩺

Miss Hunter's tale spills out like a well-practiced script. A job offer too good to refuse, with a salary that would set her up for life. But the conditions? Strange indeed. A short haircut and no questions asked. She declined, but Holmes is intrigued. We invite Miss Hunter to return tomorrow.

Turn 2HOLMES🔎

The details are sketchy, Watson. Yet the puzzle pieces fit like a glove. A man wants his daughter hidden away, her inheritance secured. And a governess to play her part? It smells of deceit and danger. I'll be ready for them all tomorrow.

Turn 3CLIENT🧥

Miss Hunter returns, and with her comes the truth. The Rucastles have imprisoned their daughter Alice, and Miss Hunter is meant to impersonate her. Holmes deduces the plan, but there's still a twist in store: Mr. Rucastle's mastiff breaks loose, attacking him as he tries to escape.

Turn 4HOLMES🔎

The pieces fall into place like dominoes. Miss Hunter was the key. She knew about Alice's imprisonment and led Mr. Fowler to the house. The dog's loose reign was no accident; it was used to cover their escape. Holmes reveals his deductions, but there's still one question left unanswered: where is Alice?

Turn 5CLIENT🧥

Mrs. Toller, the maid, steps forward with the answer. She tells of Alice's struggles against her father and Mr. Fowler, who eventually helped her escape. Holmes confirms her story, and the case is solved. Miss Hunter fades into the background, leaving the victorious duo to ponder their next adventure.

EXIT 🚪

The fog rolls in like a ghostly curtain, concealing the sinister house with its copper beeches. Holmes and Watson stand on the steps, their minds already turning towards the next case. The game is never over for these two, and there's always another mystery waiting to be unraveled. Tune in next time for more adventures from Baker Street.